

 Posts
Posts



Each month the designers at Gardening Gone Wild ask bloggers to post about a different element in their gardens' design. I've enjoyed reading those linked posts and would like to join in this one. We like the long narrow veranda across the front of our house - but the space we use the most is the patio.
 A realtor took this photo of the back of the house before we moved here in late summer 2004. We were glad to have that slab of level concrete - it would give us somewhere to put the metal table and chairs and the grill. But would anyone want to sit out there? It took a couple of years to change that barren rectangle into a place we want to be.
  In October 2006 I wrote about the evolution of our patio, describing how we'd dug out grass and used packed decomposed granite to extend the usable area of our patio. We didn't want to add more concrete, but we wanted more space... the granite worked for us, and it's also permeable rather than a hard surface to encourage water runoff.
 We added an arch with a Lady Banks rose, a coral honeysuckle and a clematis taking turns at bloom. We used flowers, shrubs and trees in large containers around the perimeter and made an herb garden in hypertufa troughs at the sunny end. Now the patio feels more like an outdoor room.
 Earlier this year I wrote about adding a disappearing fountain to the granite area right outside our breakfast room window. So far this seems like one of the best projects we've ever done. The fountain is not only beautiful, but it's been life-giving for insects, birds and animals in this hot, dry year.
Instead of a hard line between inside and outside, we now have someplace that blurs the line and connects the spaces where we live. The back of the house faces southeast, so from October to April, this is a good place to sit and have coffee, watch the birds, read, snack, converse, relax.
 But in summer, when daytime temperatures are in the normal nineties, or when we get a scorcher of a year like this one, when the high temperature approaches 100°F/37ºC each day, the chairs are used more by birds waiting for a turn at the fountain than by us.
In the afternoon the sun swings around the end of the house, and pecan trees shadow the patio, giving the plants a break. The table is handy as a work bench or to set things down as I go in and out for short stretches of time - to look at what's blooming, to water the containers, to watch the birds or to do a little gardening. The sound of the fountain is pleasant as I putter around. I use the long axis to travel from one end of the yard to the other within the shadow of the house.
 The grill is in shade by afternoon - we seldom eat outdoors in summer but cooking out here keeps heat out of the kitchen. If we want to sit outside we use citronella cones, oil lamps and torches to discourage mosquitoes on these hot and humid evenings.
Sometimes the mornings aren't too humid, and it's pleasant enough for coffee and a newspaper. But midsummer is not Austin's finest season. We're more likely to stay in the air conditioning and wait - remembering how wonderful it felt last winter to sit at this table, in a space open to the south and protected by the bulk of the house. That's when we'll really appreciate the patio, as we eat lunch and bask in the sun under the bare pecan tree, with a nearby sweet olive wafting its scent on the pleasantly cool air.

Here's a link to Nan's wrap-up of gardeners who wrote about Decks, Porches and Patios.
Annie in Austin wrote this post about her patio as part of Gardening Gone Wild's Garden Bloggers Design Workshop- Decks, Porches and Patios.


 I'd been up to Cedar Park's
  A few weeks ago Philo & I went back to HCWG - not to look, but to buy. This place is fun to wander, with large demonstration ponds, plants, fish, pottery, all kinds of fountains, fun garden art and water-work supplies fanned out for the visitor. They arrange for installation or give advice to those who want to do the work themselves.
  I threaded my way back to the stone fountain bases and showed Philo the one that had been calling my name.
  At Hill Country Water Gardens we met a very knowledgeable guy named Nicholas. He told us that this interesting stone came from
  He went for a forklift and soon the parts were ready to load.
  We could have had the stone delivered but my old car has hauled heavy garden supplies and plants for years. Philo decided it could carry the block of Lueders Stone. The door opening was a tight fit but the guys made it work. Our son was glad to help unload the stone once we had it home.
  Swallowtail butterflies lay eggs on fennel so I'd let it grow wherever it sprouted for a couple of years. We liked seeing the larvae, but the fennel's shadow was killing sun-loving herbs like thyme, and the space was needed for something else now. (Don't worry about future generations of Swallowtail larvae - I've established a second patch of fennel in the long fence border and have young plants in containers.)
 I did not want to rush this part - wouldn't a Dress Rehearsal be a good idea? Philo dollied the burlap-cushioned, heavy stone to the spot we'd chosen. We thought we knew which side should face the house, but wanted to look at it from the patio, from the walk, and through the window before we started to dig. Even without water we really liked looking at that stone!
 We needed rocks to hide the black plastic tub and screen - Nicholas told us to check out
  We wanted to save and reuse those layers, so once the stone was moved out of the way, Philo spaded up the gravel onto a screen made to fit across the garden cart.
  The larger gravel that stayed on top of the screen was scooped into more of our handy sacks and the smaller stuff scooped from the bottom of the cart went into separate sacks.
 He dug and I hauled the soil away with the wheelbarrow, returning to use the Cobra head tool to pry out rocks when he hit them.
  It took a long time to get that hole dug, use the depth gauge, get out rocks, add back finer screenings as a base for the tub, level and readjust the base and that tub moved in and out of place a number of times.

 We filled the reservoir and watched the water come out the top, then I started adding the rocks, hiding the black plastic.

 We can now sit at the table, listening to the peaceful water sounds of our dream-turned-real.
  Appropriately for a place called Circus~Cercis, the name of this kind of water feature implies that it performs a trick -
  The large containers that edge the patio have been bugging me - first I just switched the containers around and generally tidied the plants. Sometimes that's enough, and the shadier end did look better but the sunny end needed more. The Mexican Fan Palm bought last spring looked happy but the poor 'Celeste' fig was on the decline. After some of the branches were killed by a late freeze a couple of years ago, the rest of the tree gave up - bearing no fruit and with the leaves becoming smaller each year. Eight years in a pot was too long - even when the pot is a large terra cotta souvenir.
  We'd picked up this container from a garden pottery dealer along an Oklahoma highway on the way back to Austin from Illinois in late 1999. After a bout of pneumonia at Christmas, I was so weak the shoulder strap barely kept me upright in the car but I was strong enough to croak "Stop!" and to stagger around the pottery yard long enough to pick out one big clay pot; Philo had to stuff it with our luggage to fit it in the car. We continued on to Austin and as the sun grew stronger I started to feel stronger, too.
  Soon after we got back I planted the fig tree. It grew fast and I rooted a cutting in 2003. That cutting was planted in the Secret Garden after we moved here -it took hold and made figs last year. Now it was time to let the original fig go and plant something that we'd like to look at while sitting on the patio.
  The roots of the dying fig were entwined with creeping fig and 'LaBuffarosea' rainlilies in one solid mass. I clipped and pulled and clawed, tugging out bulbs but trying to leave the fig vine on the outside wall of the pot. Finally I could flip the root ball out with the roots of the creeping fig attached like an umbilical cord to the green part. I scraped and cleaned the inside of the pot.
 I cut away most of the root mass, preserving a chunk of roots from one part of the creeping fig that had attached to the outside of the pot. But instead of setting the creeping fig loose again, I stuffed its roots into a smaller plastic pot to slow it down a little, using chunks of styrofoam packing blocks to raise the black pot level with the big pot's rim. The fig vine looks cool against the terracotta so I hope it lives, but am not counting on it.
  So who is the new main inhabitant? I found a second 'Mutabilis' rose last week, at Hill Country Landscape Garden on Pond Springs Road and was pleased to find that the plant came from the
 I'd bought enough rose soil to repot the three mini-roses, too. The pale apricot mini-rose from my daughter and her husband had been potted last fall using the piece of screen at the bottom. It was doing well and needed a
  Thanks to the squirrels I found wanna-be trees in every mini-rose pot ... either live oak or pecan.
 If the rose likes its new home this end of the patio will have a 'Butterfly Rose' blooming this spring where we can see it from the breakfast room window.
  The idea for this post came from
  With warm, windy weather and no frosts in the forecast, the 'Pius X' Camellia japonica hasn't held one bud in reserve. It's thrown caution to the wind and believes in spring.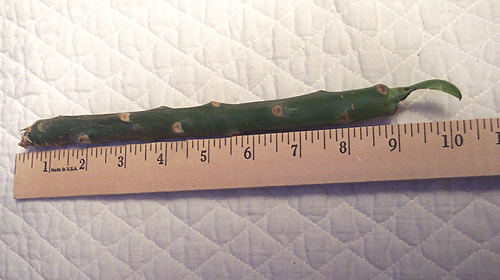
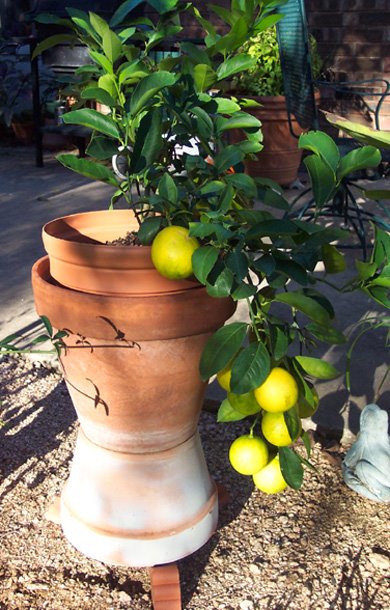
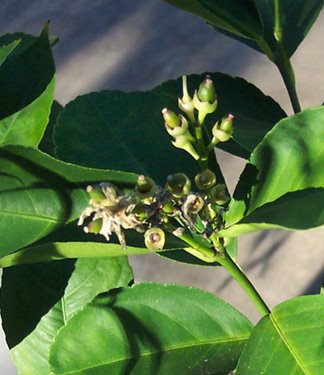
 We should probably start referring to this space as the conservatory – the Meyer’s Lemon is also inside near the windows. Christopher from Hawaii suggested that we keep this lemon tree as a potted plant, and buy a new one for the ground. This idea made sense to my husband, and with 7 almost-ripe lemons on it along with a new batch of pea-sized fruit, I couldn’t bear to leave it outside!
 On the windowsill in the photo you can see the little Aloe, safe because Pam/Digging warned me it was tender. Last winter, a pink tropical Hibiscus spent the winter in the breakfast room but it wasn't happy, developing both mealybugs and aphids. I set this plant close to the back wall near a window, but won’t let that Hibiscus inside this winter. There was a good spot for the Hedychium coronaria [Hawaiian White Ginger] near the back fence, so a big chunk from the patio container went there, with lots of amendments, a good watering, and leaf mulch piled around the base. The 'Best of Friends' daylily from Pam was planted, too, but the rest of the garden had to be left to chance.