


This post, "Adding A Water Feature", was written for my blogspot blog called The Transplantable Rose by Annie in Austin.
Are any of you Social Garden Shoppers? I sure am - happily volunteering when a friend wants company on a trip to a nursery or garden center. What's not to like? Wandering the aisles while talking to another gardener is one of my favorite things! Sometimes I find supplies or a few plants and sometimes I just look and think and dream.
 I'd been up to Cedar Park's Hill Country Water Gardens with Philo a few times, looking and dreaming, then last summer I tagged along when a couple of other gardeners wanted to go there. On each visit I found myself gravitating to the same area of the display yard and my dreaming found a focus.
  A few weeks ago Philo & I went back to HCWG - not to look, but to buy. This place is fun to wander, with large demonstration ponds, plants, fish, pottery, all kinds of fountains, fun garden art and water-work supplies fanned out for the visitor. They arrange for installation or give advice to those who want to do the work themselves.
  I threaded my way back to the stone fountain bases and showed Philo the one that had been calling my name.
  At Hill Country Water Gardens we met a very knowledgeable guy named Nicholas. He told us that this interesting stone came from Lueders, Texas. Then he explained the process of making a base into a fountain and we made decisions - delivery or take-with, tub size, the pump, concrete blocks and screens.
  He went for a forklift and soon the parts were ready to load.
  We could have had the stone delivered but my old car has hauled heavy garden supplies and plants for years. Philo decided it could carry the block of Lueders Stone. The door opening was a tight fit but the guys made it work. Our son was glad to help unload the stone once we had it home.
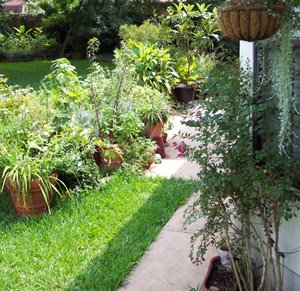
 The block sat on the sidewalk for days while I reworked the patio area. We planned to install the fountain in the decomposed granite area right outside the breakfast room window. Some pots and troughs needed to move aside and a lot of self-sown fennel had to be pulled out.
 Swallowtail butterflies lay eggs on fennel so I'd let it grow wherever it sprouted for a couple of years. We liked seeing the larvae, but the fennel's shadow was killing sun-loving herbs like thyme, and the space was needed for something else now. (Don't worry about future generations of Swallowtail larvae - I've established a second patch of fennel in the long fence border and have young plants in containers.)
 While I puttered with pots, Philo measured and planned. He tacked together a depth gauge from pieces of wood, a useful tool for knowing how to dig the hole for the black plastic reservoir tub. He sketched and took notes and made a cardboard template of the base.
 I did not want to rush this part - wouldn't a Dress Rehearsal be a good idea? Philo dollied the burlap-cushioned, heavy stone to the spot we'd chosen. We thought we knew which side should face the house, but wanted to look at it from the patio, from the walk, and through the window before we started to dig. Even without water we really liked looking at that stone!
 We needed rocks to hide the black plastic tub and screen - Nicholas told us to check out Jacobs Stone and Landscaping , a wonderland of building materials where we found a medium-size mix of Texas river rocks that we liked. We only needed a few 5-gallon buckets and shoveled them ourselves, reusing 5-gallon sacks from our previous expeditions for compost and decomposed granite to tote them home.
 (The story of how we extended our standard rectangular concrete patio by using thick layers of pea gravel and decomposed granite is told in this 2006 post. )
 We wanted to save and reuse those layers, so once the stone was moved out of the way, Philo spaded up the gravel onto a screen made to fit across the garden cart.
  The larger gravel that stayed on top of the screen was scooped into more of our handy sacks and the smaller stuff scooped from the bottom of the cart went into separate sacks.
With the good stuff cleared, he then started on the black heavy clay underneath.  He dug and I hauled the soil away with the wheelbarrow, returning to use the Cobra head tool to pry out rocks when he hit them.
He dug and I hauled the soil away with the wheelbarrow, returning to use the Cobra head tool to pry out rocks when he hit them.  It took a long time to get that hole dug, use the depth gauge, get out rocks, add back finer screenings as a base for the tub, level and readjust the base and that tub moved in and out of place a number of times.
  I'm not going to detail the fun with concrete blocks or fitting the pipe and motor or describe the access hatch Philo constructed - each installation will be different. The gravel and granite were packed in around the black tub.
 The most nerve-wracking part came next - it took strength to move over three hundred pounds of solid rock across gravel or concrete, but now Philo and our son needed precision as well as strength.
 They used the dolly and boards, getting the heavy stone up over the lip and onto the plastic grate with the concrete supports underneath.
 We filled the reservoir and watched the water come out the top, then I started adding the rocks, hiding the black plastic.
The rock placement has already changed and evolved, and they'll be moved again for cleaning or possibly raccoons will rearrange them. Maybe rocks from other places will be added by visitors.
 One recent visitor found out that adding and subtracting rocks where the water emerges from the rock results in different sounds and sprays, and she also improved the arrangement of the rooks at the base.
  We can now sit at the table, listening to the peaceful water sounds of our dream-turned-real.
  Appropriately for a place called Circus~Cercis, the name of this kind of water feature implies that it performs a trick -
 Ladies and Gentlemen...presenting for your amusement...
the Disappearing Fountain!
This post, "Adding A Water Feature", was written for my blogspot blog called The Transplantable Rose by Annie in Austin.


 Hardscape can be expensive and tree removal ate most of this year's garden budget. I'd like to install brick or stone edging some day, but these rocks also qualify as hard, and they were free for the hauling.


 As the spiraea faded, Ellen’s purple iris burst into glorious bloom. Today the liriope edging is filling out while flowers in the Bat-bed include ‘Coral Nymph’ Salvia, pink rainlilies, purple coneflower and the large pink bat-faced cuphea.
  Once the too-close coneflowers and Balloon Flowers were moved to the pink bed, the Cuphea had room to grow tall and full.
 I opened my wallet and paid for a few plants. Our local grocery store wanted $5 for a one-gallon pot holding three plants of dwarf Pink Gaura. I bought a Rugosa Rose called ‘Therese Bugnet’ described as tough, pink and fragrant. I found Pink Pansies for the hanging basket in late spring, [replaced with Evolvolus 'Blue Daze' for summer] and planted a strain of Heirloom Petunias in pink, white, magenta and lavender.

 The rains helped settle in the larkspur, balloonflowers, skullcap, 'Champagne' mini-rose, heirloom petunias and malva.
  I was sure that if the plants looked this good in June, they'd look even better by the time the pink crepe myrtle bloomed.
 It's now late in July, the heat hasn’t arrived yet, and Austin is in the middle of the rainiest year ever recorded - we've had another 3 and 1/2 inches just since Monday. Many plants look kind of beat-up and overgrown - like this 'dwarf' 3-foot tall gaura. The Texas Mountain Laurel is not happy to be living here. The Scuttelaria is looking cranky. The bed is looking very shaggy! I'd hoped that keeping the grass edged around the bed would give it definition, but the electric edger can't be used when every day is rain day.


 Although the Barbados Cherry didn't work out, we hope to make a different native evergreen grow in our garden. In the raised part, we planted a